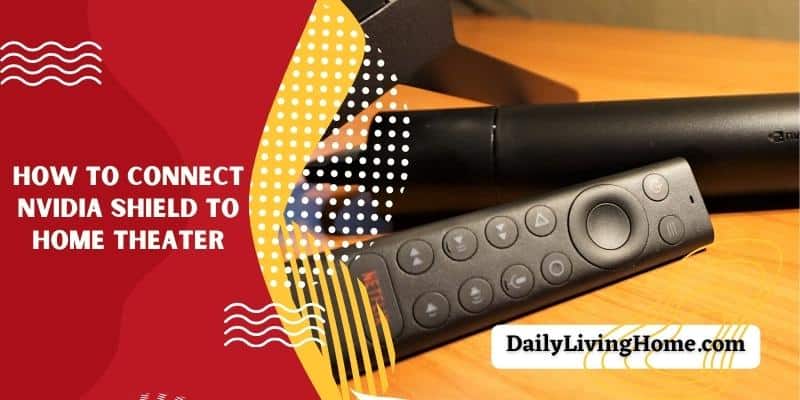
The experience of a home theater is always happening and blissful. Having a theater at home with top-notch sound quality and a big screen is what everyone loves to have. But to make the experience even better, a lot of people consider connecting the NVIDIA shield to home theater. Connecting it just makes it easier to operate the home theater while relaxing back on the sofa.
Though using the NVIDIA shield with home theater is a popular idea, many people don’t use it as they don’t know how to set it up. The process is simple only if you know the right way of doing it. Also, some are unaware of the benefits of using it. This is why knowledge regarding the NVIDIA shield and home theater is necessary to enjoy to the fullest.
So to help you out with this, I am here with this article discussing how you can connect and use the NVIDIA shield to home theater. Stay with me, learn the most about it, and enjoy the best home theater experience ever.
4 Simple Steps To Connect NVIDIA Shield To Home Theater:
Your Android TV and the AV sound system make the home theater. So when you are connecting it to the NVIDIA shield, it should be connected both to the AV system and the TV.
However, if you have a separate HDMI device, you can connect the cables of the AV and TV to it and start operating the device. But before all of that, you need to know the parts of the NVIDIA shield and how to connect it.
Here are four steps, detailed and explained, to help you connect NVIDIA shield to your home theater:
Step 1: Know What Comes With The Device
So the NVIDIA shield has an operating box or android TV box. You can also name it a Set-Top Box as it works similarly to the Set-Top Box. This is the main device with several ports for connecting the TV and AV to the NVIDIA shield. All the other parts of the device are for operating the TV. Basically, those are the remotes.
Apart from the box, you get a game controller with D-section, on and off button, audio control buttons, and other rockers, knobs, triggers, that a gaming controller has. It has a port for connecting the audio from the TV and a charging port too.
Along with it, the NVIDIA shield has a remote as well as an infrared remote. The normal one works like any other smart TV remote while the infrared remote is for more detailed operation. Starting from fast-forwarding a program to altering the sound field, the infrared remote is for all the advanced operations.
Besides these three main devices, there are some wires and plugs that you will get to know about in the coming sections. These wires are for connecting the device to the home theater.
Step 2: Connect The Cables To The Android Tv Box
Look at the back of the android box. You can see a number of ports on the backside of the device.
At the left, you have to attach the power cable. Next to it, you can find the HDMI port and the ethernet port. Though you can use a wireless connection, the ethernet allows you to connect it with wire. A wired ethernet connection allows you to open large MKV files with zero interruption.
Next comes two USB ports. You can use one of the ports (3.0 port) to charge the remotes of the NVIDIA shield. The 2.0 USB port and a micro SD port for extra storage. You can connect your Pendrive and chip cards to watch your favorite programs.
Connect all the plugs that are necessary. The power cable, HDMI cable, and ethernet cable are the basic connectivities you need. The HDMI port exposes the sound. The configurations are different in different models. But the basic surround audio is 7.1. You can also enjoy 4K videos and streaming with this device.
You can connect your Bluetooth Keyboard or earphone to the NVIDIA shield too using the remote.
Step 3: Plug-In The HDMI Cable To The AV System
You have now connected the Android Box to the TV. Now is the turn to connect the cable to the AV System.
Use an AV receiver compatible with the NVIDIA shield device. You can see USB ports in the AV receiver where you would connect the HDMI cable as it passes the sound to the room.
Plugin the HDMI cable into the AV system to connect the TV to the sound system. So now, when you operate the TV with the remotes, the entire home theater device would synchronize and give you the real and theater experience.
Step 4: Download The Apps:
All the ports and cables are now connected. If you want a Bluetooth connection, do that by going to the TV’s setting, turning on the Bluetooth, and pairing it with the desired device. That is how all the connections would be made. Check the cables properly and as you see the TV Box is lighting up in green light, the device is on.
Use the remote to download the apps from the play store that you would like to use. After you download the applications, use the remote to play whatever you like to watch. As the TV and AV systems are connected to the NVIDIA shield device, you can now operate all the activities with the remote of this device starting from watching a show to playing video games.
Steps To Connect NVIDIA Shield Bluetooth To Home Theater:
Besides connecting the cables to the TV and AV systems, you also get the option to connect it to Bluetooth. The NVIDIA shield can also function by connecting it to the Bluetooth of the home theater. The steps are very simple and easy. So let me explain the process a bit:
- After the HDMI and power cables are connected, go to the TV settings. As the NVIDIA shield is connected to the TV, you can alter the setting from the TV settings only.
- Now find the option Remotes and Accessories. Click on this link and opt for the Add Accessory option. As you press this, the device would start finding a Bluetooth connection within the range.
- Turn on the Bluetooth of the device you are wanting to connect to the NVIDIA shield. Be it a keyboard or earphone, turn on the Bluetooth of the device.
- Now you can see the device’s Bluetooth name on the TV screen. Select the device’s Bluetooth name on the screen and it will get connected to the NVIDIA shield TV within seconds.
These are the simple steps to connect your TV or home theater or any other device to the NVIDIA shield and expand the usability opportunities.
Frequently Asked Questions About NVIDIA Shield:
How To Use Dolby Display In NVIDIA Shield Home Theater?
Dolby display is one of the important features needed to watch 4k ultra HD videos. To enjoy this facility, you need to set up the TV and the NVIDIA shield device.
The device needs to be updated and the software has to be the latest to enjoy the 4K video quality. And your TV should support HDMI 2.0 input and HDCP 2.2. Connect the HDMI cable to the shield TV. If possible, get an HDMI- UHD cable for the best 4K videos.
Make sure to enable the UHD option from the TV Set as some devices keep it disabled. Now that all the connections are set up with the cables and TV settings, you can now enjoy Dolby Display Ultra HD Videos with the NVIDIA shield.
How To Connect NVIDIA Shield To Home Theater Receiver?
Connecting the receiver or the TV of the home theater to the NVIDIA shield is the first step to attaching these two devices. Until you connect the NVIDIA device to the receiver, you can’t operate it.
To connect the NVIDIA shield to the home theater receiver, turn off the monitor. Now connect the two devices using an HDMI 2.0 port. The one end of the HDMI port would be plugged into the TV port and the other one would go to the TV receiver or android box. As the cables are attached and you switch on the device, the two devices will be connected.
How To Setup Home Theater Sound To NVIDIA Shield?
High-quality sound is one of the major reasons why the NVIDIA shield has become popular. Now how can you connect the surround sound to the NVIDIA shield? Let me tell you how.
First, use a 2.0 HDMI cable to connect the device to the TV. Now to activate the receiver, use HDMI- ARC cable to enable the audio settings. Then operate the sound system from the TV screen. In settings, go to ‘device preferences’ followed by the ‘display and sound’ option. Click on it and go to the ‘advanced sound setting’.
Here, you have to enable the manual audio setup option and disable the other Dolby functions except for the AC3. Now, you can enjoy the surround sound using the NVIDIA shield.
How To Control The NVIDIA Soundbar?
Controlling and operating the sound system using the NVIDIA shield is a common desire when you install the device. For a customized sound experience, operating the soundbar is necessary.
You can control the soundbar from the TV screen once you connect the TV with the receiver. Go to the settings and move to the ‘display and sound’ option. There you can see the option of either ‘power control’ or ‘volume control’.
Click on it and then go to ‘Setup IR for TV’. From here onwards, the steps would be mentioned to alter the sound settings and operate the soundbar as per your desire.
How To Pair Bluetooth Remote To NVIDIA Shield Home Theater?
Pairing a Bluetooth remote or controller is an essential feature of the NVIDIA shield especially for wireless functions. So you must know the process of connecting a Bluetooth controller to the NVIDIA Shield TV.
After you attach the HDMI cables, go to the setting of the TV screen. Here you can see the option of ‘remote and accessories’. Click on this option and find the option of ‘add accessory’. As you click here, the device would start searching for the Bluetooth devices that are within the range.
So now, turn on the Bluetooth of the controller or remote. As you see the controller’s Bluetooth name on the screen, pair it. As you pair the controller to the shield TV, it is now for use.
How To Connect NVIDIA Shield To PC?
For a wide range of usability, you may like to connect the NVIDIA shield TV to your PC. For that, you need to set up the TV and connect it to the PC.
Go to the setting of the shield TV. There, click the option ‘game streams PC’. Here you can see the PC options. So press on the PC name that you want to connect the shield TV with.
For the TV to access and pair with the PC, there would be a 4 digit one-time password on the TV screen. Input this code in your PC to pair the two devices. Once paired, you can now conduct your activities on both the TV and PC.
How Can You Program NVIDIA Shield On TV?
Many may know the process of connecting the NVIDIA shield to the TV. But not all know how to program it and use it on the TV.
After you plug in the HDMI cable, power cable, Ethernet, or wifi, now you need to change the settings. Without changing the setting, you can’t use the NVIDIA shield. So go to the setting and see the input options.
There, choose the HDMI input option where you have connected the shielded cable. Now the shield is activated and you can use it on your TV.
Conclusion:
Besides knowing how to connect an NVIDIA shield to a home theater, you have also learned to operate and set it up correctly. For an excellent home theater experience and easy operation, setting up an NVIDIA shield is a wise decision.
Now that you know the process, why don’t you try setting it up today?