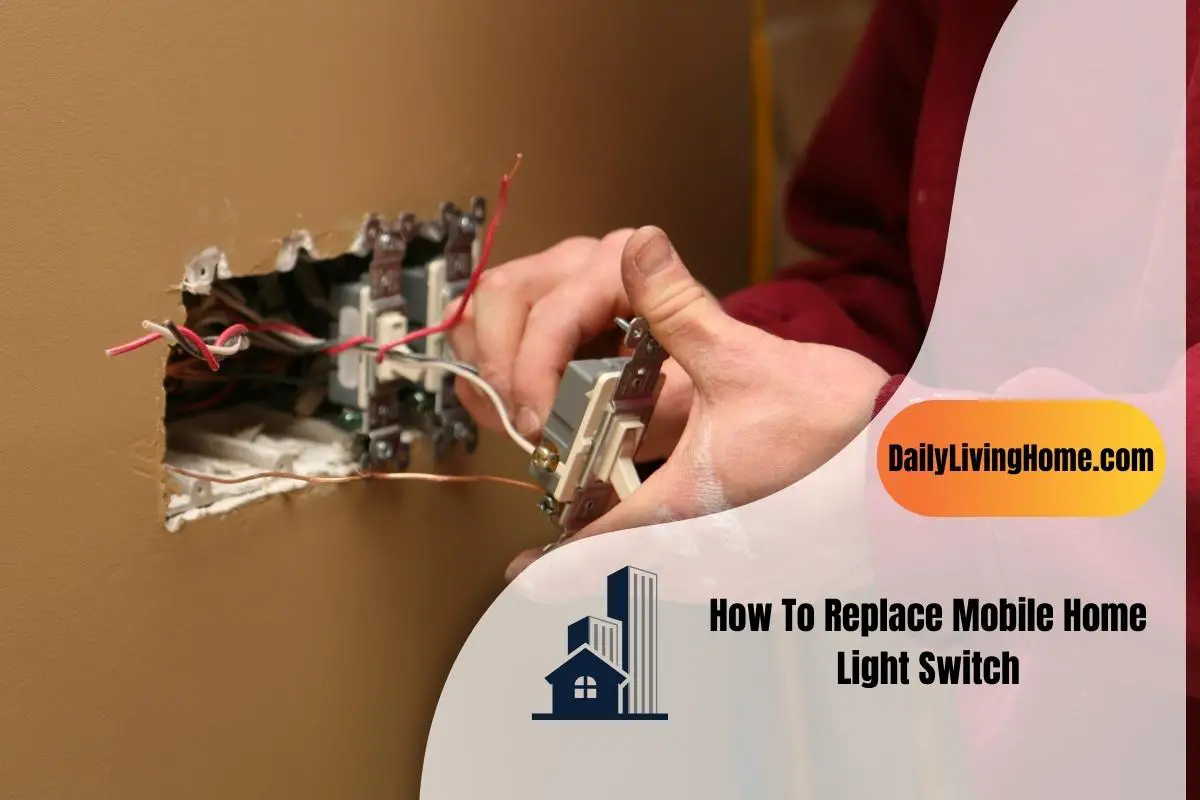
Replacing any mobile home light switch is a little annoying if you’re a beginner or scratchy over the fact. If you see at first appearance towards the switch, there are a lot of wires together inside a tube.
I personally get confused when to unscrew the older light switch board and exchange it with the new one. Again, you need to be very careful about the short circuit and the main board connections. As soon as I was successful on my first attempt, all of my confusion disappeared. So today, I’m going to share my own strategies and steps that I follow to replace any mobile home light switches.
However, let us learn about the step-by-step guidance on how to replace mobile home light switches.
7 Best Steps To Follow To Replace 2-Way Mobile Home Light Switches
Let us begin the job and be aware that you have followed all the steps carefully. Do not skip any of the steps.
Step-1: Collect All The Things That You Need For The Task:
Here are the important things and tools you need to collect. Again, when you’re going to replace the new switches, make sure to have a two-way work box to cover the wire. As though,
- Screwdriver,
- Wrench,
- Thinner knife/fresco knife / Wire stripper,
- Work box,
- New set of home light switches (1 or 2 according to your need),
- Safety equipment,
- Screws or Nailing pin (1 box),
- Power voltage tester,
- Needle nose pliers.
Step-2: Pull Out The Old Switch Boxes:
First, you need to pull out the old switches. Before that, check out the power voltage and ensure that you’re not starting to work by turning on the electricity running. You can ascertain this fact by checking the switch connection with any power voltage tester.
After this, take a screwdriver and wrench. Hold one side of the switches with a wrench and unscrew the knots by using the screwdriver. Loosen the switch base from the wall.
Once you are finished removing all the screw nuts from this, the switch base might stick too strictly with the wall. So, here you need to push the base to come off. You can try to push forward and backward norms to separate them from the wall.
Or, try to hold one part of the switch base with a wrench and tear the part with a thinner knife. Some people love to do the job with a fresco blade. Once you’re done, go for the next step.
Step-3: Separate The 3-Lines Power Cord Carefully :
Once you’re done, you will be able to see a three line cord here. The vast majority of people make a mistake choosing or attaching the cord here. You need to be very careful before separating them from the old switches. It’s because once those cords are being turned or ruined, you won’t be able to connect them with the new one. Below is a short introduction to these 3-cords.
- First cable- (At the bottom of switches) generally known as a power in (line).
- The second cable is used as a switched power out (load), and
- The third cable is required as a power switch that is used to turn on the light.
So, you need to remove the work box first. There you also find three secure knots to unscrew. Unscrew them both and then remove the first cable from the box. Keep in mind that each of the cables has three pairs of wires. One is black, the second is made of tungsten and the third one is white. All those wires are covered by the protective cord.
Again, those whites wires nutted together to run the power swiftly. The black switched power helps to turn on the light to one side of the home switch. Besides, when you turn on the switch, the black wire works to power in, and turning off the switch will work as an opposition. That means it will keep itself neutral to remain the black wire disconnected.
Anyway, now take a thinner knife or fresco knife to squeeze the wire from the box one by one. After removing the old working box, leave the three cords as usual.
Step-3: Fix The Alignment:
Now it’s time to fix the alignment of your new adjusted light switch. Check the fittings and also unscrew the knots from there. Set the switch inside the wall and remove all the dirt from there.
Step-4: Add The Three Remaining Power Cords:
Now add the 3-remaining power cords one by one inside the wall. Take a screwdriver and place each of the wires attached with a cord inside the box. Make sure that you keep pressurizing the core of the wire to go through the box cases. The task might be done gently and patiently. And you should keep in mind that your intention is not to tear the wire but attach them to the switch box.
After I finished adjusting and encroaching those wires inside the box. You need to cover them with the working box.
Step-5: Secure Them With Nailing Pin / Screws & Check The Switch:
Now secure them with the screws, and attach the working box over them. Tighten the screws using the screwdriver and secure them tightly. Now it’s time to place them inside the wall. Push the switch box to place it safely.
Make sure that the three pairs of cords will enter the hole of the wall. Then, secure the switch box with screws. Settle them by adjusting the screws. Now check out the switch connection by turning the button on or off frequently.
How To Replace 1-Way Mobile Home Light Switches
For your better concerns, above, we only discuss the two-way home light switches replacement. But what about to do while it’s come to replace the one-way home light switches. Those are also easy to replace, except for some issues. One of the common issues you may face is about installing them without grounding.
In most cases, you will find them adjusted into the electrical box. Yet, if you don’t find them on the box, then you need to buy them separately and attach them to the box. We cover these tricks too for the betterment of your light switch installing journey.
Step-1: Things You Need To Assemble:
Installing the one-way light switches doesn’t need any extra pennies from you. You can easily find the tools from your regular garage or storeroom. Those tools are also available in any hardware store.
- One way single light switches,
- Circuit tester (non-connect),
- Wire cutter,
- Tape,
- Needle nose pliers,
- Wire connectors (UL-rated).
Step-2: Remove Switch Plate & Test About The Running Current:
At this time, you need to remove the switch plate. Then, take a tester or circuit tester which will help you to know if any remaining current flow exists or not. If so, then you will soon be notified about it with a deemed light up.
Moreover, if you recently switch off all the connections over there, it is totally unnecessary to worry about the remaining current flow inside the plate. Now, remove the screws from the switch’s cover plate.
Step-3: Open Up The Switch Board Plate:
Now, try to open the switch board that sits behind the board plates. You need to extract the switch and pull the plate from the wall. Be aware of the fact that you won’t pull out the outdoor straps as well as avoid stressing the wires. It’s important, because most of the time the old wire may be brittle and the insulation may get cracked.
Step-4: Test Out The Wires & Separate All The Old Parts:
One way mobile home light switches come with some unique configuration. Most of the wires are well-constructed with NM cable. You will be notified there that the wire will be twisted with the black insulation. On the opposite side, you will also get brass or copper color screw terminals there.
On the other hand, another light switch, named switch loop was made with black and white wire tape marked. Those colored switches had been only used for preventing short circuits or hot electricity flow.
Anyway, whatever it has, you need to separate all the old parts from the switch. And exchange them with the new one.
Step 5- Attach The New Switch:
After I finished removing all the old parts from the switch, now it’s time to attach all the new parts there. You might need to add here a grounding pigtail with the green grounding screws. But, if the switch case already has the parts, then it’s not necessary for you to attach them.
Now tighten the screws and tug all the parts to make sure that those are securely attached to the main power cord.
Things To Consider Before Replacing Mobile Home Light Switches
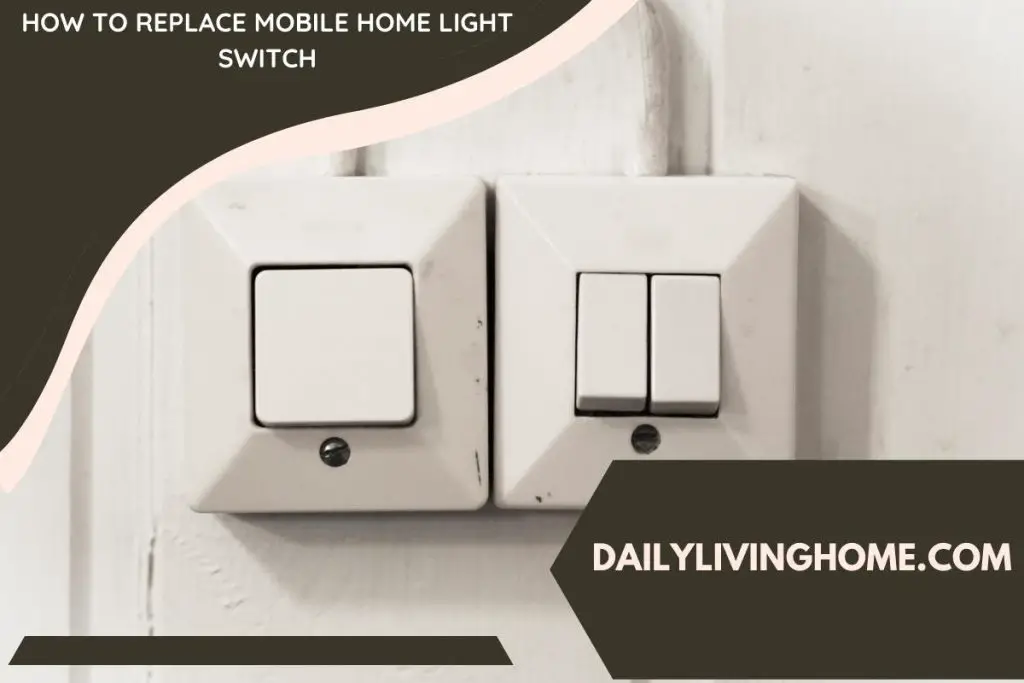
Hence, there are plenty of options available, but among them, this white plastic one is easy to attach and replace. All you need to gather some tools and obviously get some personal advice from an expert. You can also take help from the manufacturer instructions that come with your new buying home light switches.
Anyway, before starting the main task, let me clear some important facts about the home light switches. You might keep note of these facts before starting the main task.
Note-1: Know The Basics Of Light Switch Wire:
If you’re a beginner, you might have noticed and got basic knowledge about light switch wear. At first appearance, you might have noticed there are two different types of wire inside the switch. While you’re turning on the light, the power runs through black/hot wire. As soon as it comes back to the white/neutral wire, it will penetrate into the ground.
So, you need to be aware of the wire. There is also one sort of switch wire, you’ll find, which is called an electrical fault. You will find them inside the switch with green color wrapped. They are also known as safety wires as they prevent excessive voltage to run throughout the switches.
Note-2: Do Not Forget To Wear Protection:
Remember, you should not compromise about taking enough protection when it comes to the fact of electricity. There is no prediction of where and when you will get shocked by the running electricity. So, wear hand gloves. Obviously, they might have to be rubber-made. Wear leather shoes and always turn off the main electricity line while you’re working on it.
Note-3: Earthing Safety:
Maximum mobile light switches come with the combination of a metal mounting box and a plastic sheet plate or faceplate. In that case, you have connected it to the earthing core attached to the terminals. If the faceplate is made with metal, it will run through the earth’s core too first. Again, if the faceplate and the lighting switch both come with plastic, then you have to attach a sleeve over the bare cores. The bare cores will clamp or hold the remaining exposed areas as connectors.
Related Questions
Where Are GFCIs Situated In Mobile Home?
In the late 1980s to 90s, most mobile home decorations typically had one GFCI convenience that is usually found in the garage. It will cover the whole demands of a house for instance bathrooms, exterior, spa tub, and others.
It is worth knowing that each mobile home has considerably one GFCI. And nowadays, they’re located in the bathrooms for home decorator choices. So if you’re looking for the GFCI, you might have found them in the bathroom at first.
How Do You Replace a Light Switch In a Mobile Home?
Light switch comes in its own box. To replace them from your mobile home, you need to remove the older one first. Push the switch holder with the help of a wrench. But don’t push them stubbornly, as they may come off the cord.
One of the common facts about this switch is that it is fitted into the thin walls without any hassle. Again, the cable is adjusted between the 2-pieces of plastic. So, you don’t need to add any box volume here as a requirement. However, after pulling them out, put the new switches inside the wall. Finally, secure them with screws and tighten them as much as you can.
How To Install Dimmer Switches On A Mobile Home?
Installing dimmer switches on a mobile home is quite similar to changing any light switches. Anyway, to install those switches, you need to separate all the old constructions from the wall. Dimmer switches require an extra black line from the ceiling to the switch. So you need to add those extra black lines to the wall switch too.
Afterward, connect the blue wire to the controller that will always dim a light. Then, attach the additional wiring to the main electrical lines. Cover this long cord with a box. Then screw them all together.
Is Replacing A Light Switch Difficult Or Hard?
Whether you’re inexperienced to handle these kinds of tasks, replacing any light switches for the beginner is not as difficult as one thought. All you need to do is focus on some tricks and systems that everyone used to do.
You can play with any older unused switch before going to play with the original one. Replacing any home light switch is quite easy and much easier that anyone can do it. But don’t forget to check the diagrams of each light switch, as there are different types and variants. But this has similar basic procedures to change and replace.
How Much Does It Cost To Replace A Light Switches From Mobile Home?
If you don’t want to replace the light switches on your own, it is better to seek help from any third parties. Yes, most of the servicing companies provide these facilities too. And the cost varies on the number, and model of your light switches. In general, the cost of replacing any light switches from mobile homes ranges from $65-$125.
On the other hand, if you want to change the entire house fixture by their service, the cost may increase. It starts from $400 for several hours or more. Again, you might have to pay for any extra wires if they need them during the replacement period.
Final Wrap
That’s all about how to replace mobile home light switches that I want to consult you about. Remember that every electronic piece of equipment comes with some particular designs and diagrams. Before you’re going to start the task, don’t hesitate to take ideas from the diagrams.
Besides that, try to keep an eye on the three cords of the wall. Those are important as they’re interlinked with the main line. So don’t get in a hurry to remove them from the case. The overall task may take 10-12 minutes. So do it with patience.